Preparing the RV for full-time living
Sushila’s last day of work will be May 30th, and we’d like to hit the road as soon as possible after that. My last day was April 13th, and I’ll be using the next month and a half to prepare the RV for our trip. The RV doesn’t really need any work to hit the road (aside from a few minor repairs); we bought it in good condition, and assuming the inspection doesn’t reveal any major problems, we’re good to go. That said, since we’re going to be living in the RV full time, we have some modifications and upgrades planned to make the RV more comfortable for us. I’ll add a few posts to the blog to give everyone an idea about what we’re doing.
Getting Started
My big goal for the first week was to open up the RV and really figure out what and where everything is. Unfortunately, RV manufacturers don’t make schematics or wiring diagrams or anything like that available to owners. The best we have is the floorplan picture from the RV brochure.
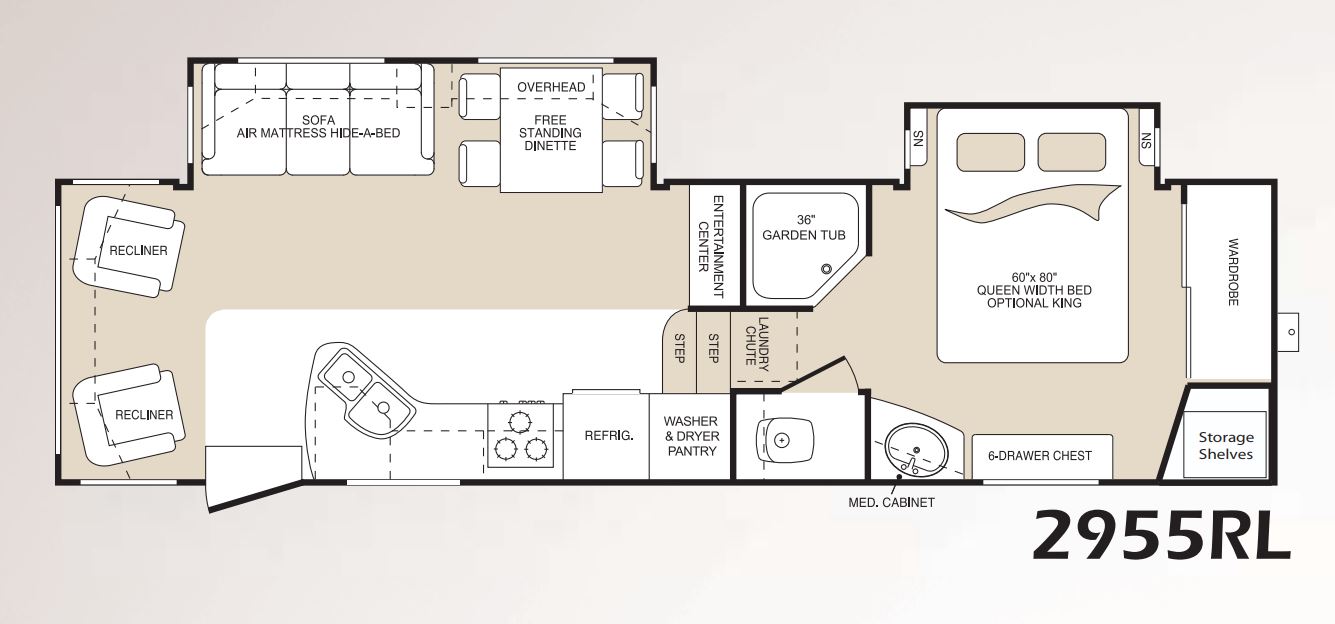
Our projects include electrical upgrades, solar panels, and antennas, all of which will require running cables through the RV, so we need to know where the existing wires run and where we can run new ones. It’s also important to understand all of the access points in the RV. For example, the water heater can be accessed through the panel along the steps, and the wiring in the hallway wall is accessible behind the central vacuum. If we’re lucky, that information won’t really be necessary, but RVs are known for needing regular maintenance and repairs, so I’d rather know ahead of time how everything fits together.
Lights and Switches
To start off, I decided to tackle a simple project: mapping all of the outlets and light switches. I’m not exactly “handy” (yet), so I didn’t want to overwhelm myself. I powered up the RV and walked around testing all of the outlets and flipping all the switches. It turns out that most of the interior lights are not on the switches; only the ceiling lights are. None of the outlets are switched. I also found that all of the existing lights are incandescent bulbs. We’ll want to swap those out for LEDs. I took a few notes and that was that.
A bit later, my dad stopped in to see how everything was going. Proud of my hard work flipping light switches, I told him what I had found and went to demonstrate. I flipped the switch for the ceiling lights in the living room. Nothing happened. I tried again; still nothing. The lights did dim a bit, but they definitely didn’t go off. I tried all of the other switches, and they worked as expected. The living room lights no longer wanted to turn off, though.

With the lights on half the day, and after leveling the RV and moving the slides in and out a few times, the battery was pretty low. Our first thought was that maybe the lights had some kind of emergency mode that would trigger when the power was low 1. My brother wasn’t home yet, so we plugged the RV into the truck and started it up to get a bit of charge. The truck charges it pretty slowly, so we waited. After about an hour, we had what seemed like a reasonable level of battery charge, so we tested again. No change.
At this point, my brother, Luke, gets home. We explain the problem to him, and he doesn’t really have any ideas either. We decide to try shore power rather than battery, and we plug in to the house. Still no change. At this point, we suspect that there might be a problem with the switch that’s shorting the connection. We pull the switches off the wall and disconnect the wires entirely. Even with the wires completely disconnected, the lights remained on. We’re now starting to worry that something has shorted in the wall somewhere. This is not how I wanted my first week with the RV to go.

We’re starting to brainstorm ways to continue troubleshooting, but it’s getting pretty cold. Since we’re still hanging out in the RV, I decide to turn on the heater. As my dad always taught us, it’s not good to heat the outside, so I close the door of the RV.
The lights go out.
It turns out the door has a second switch that controls the living room lights so that they turn on when you open the door. Ugh. Not our finest moment, but at least there isn’t a major problem with the RV’s wiring!
I have a lot to learn in the next couple months.
Up next
I started a few other projects/repairs this week. They’re a bit more involved, so I’m planning to do dedicated posts on them to go into more detail. Here’s a very quick teaser on what we’re working on, though.
Ladder Repair
The ladder on the RV was slightly damaged when we bought it. The first step was completely missing, and a metal piece connecting the ladder to the RV was broken.
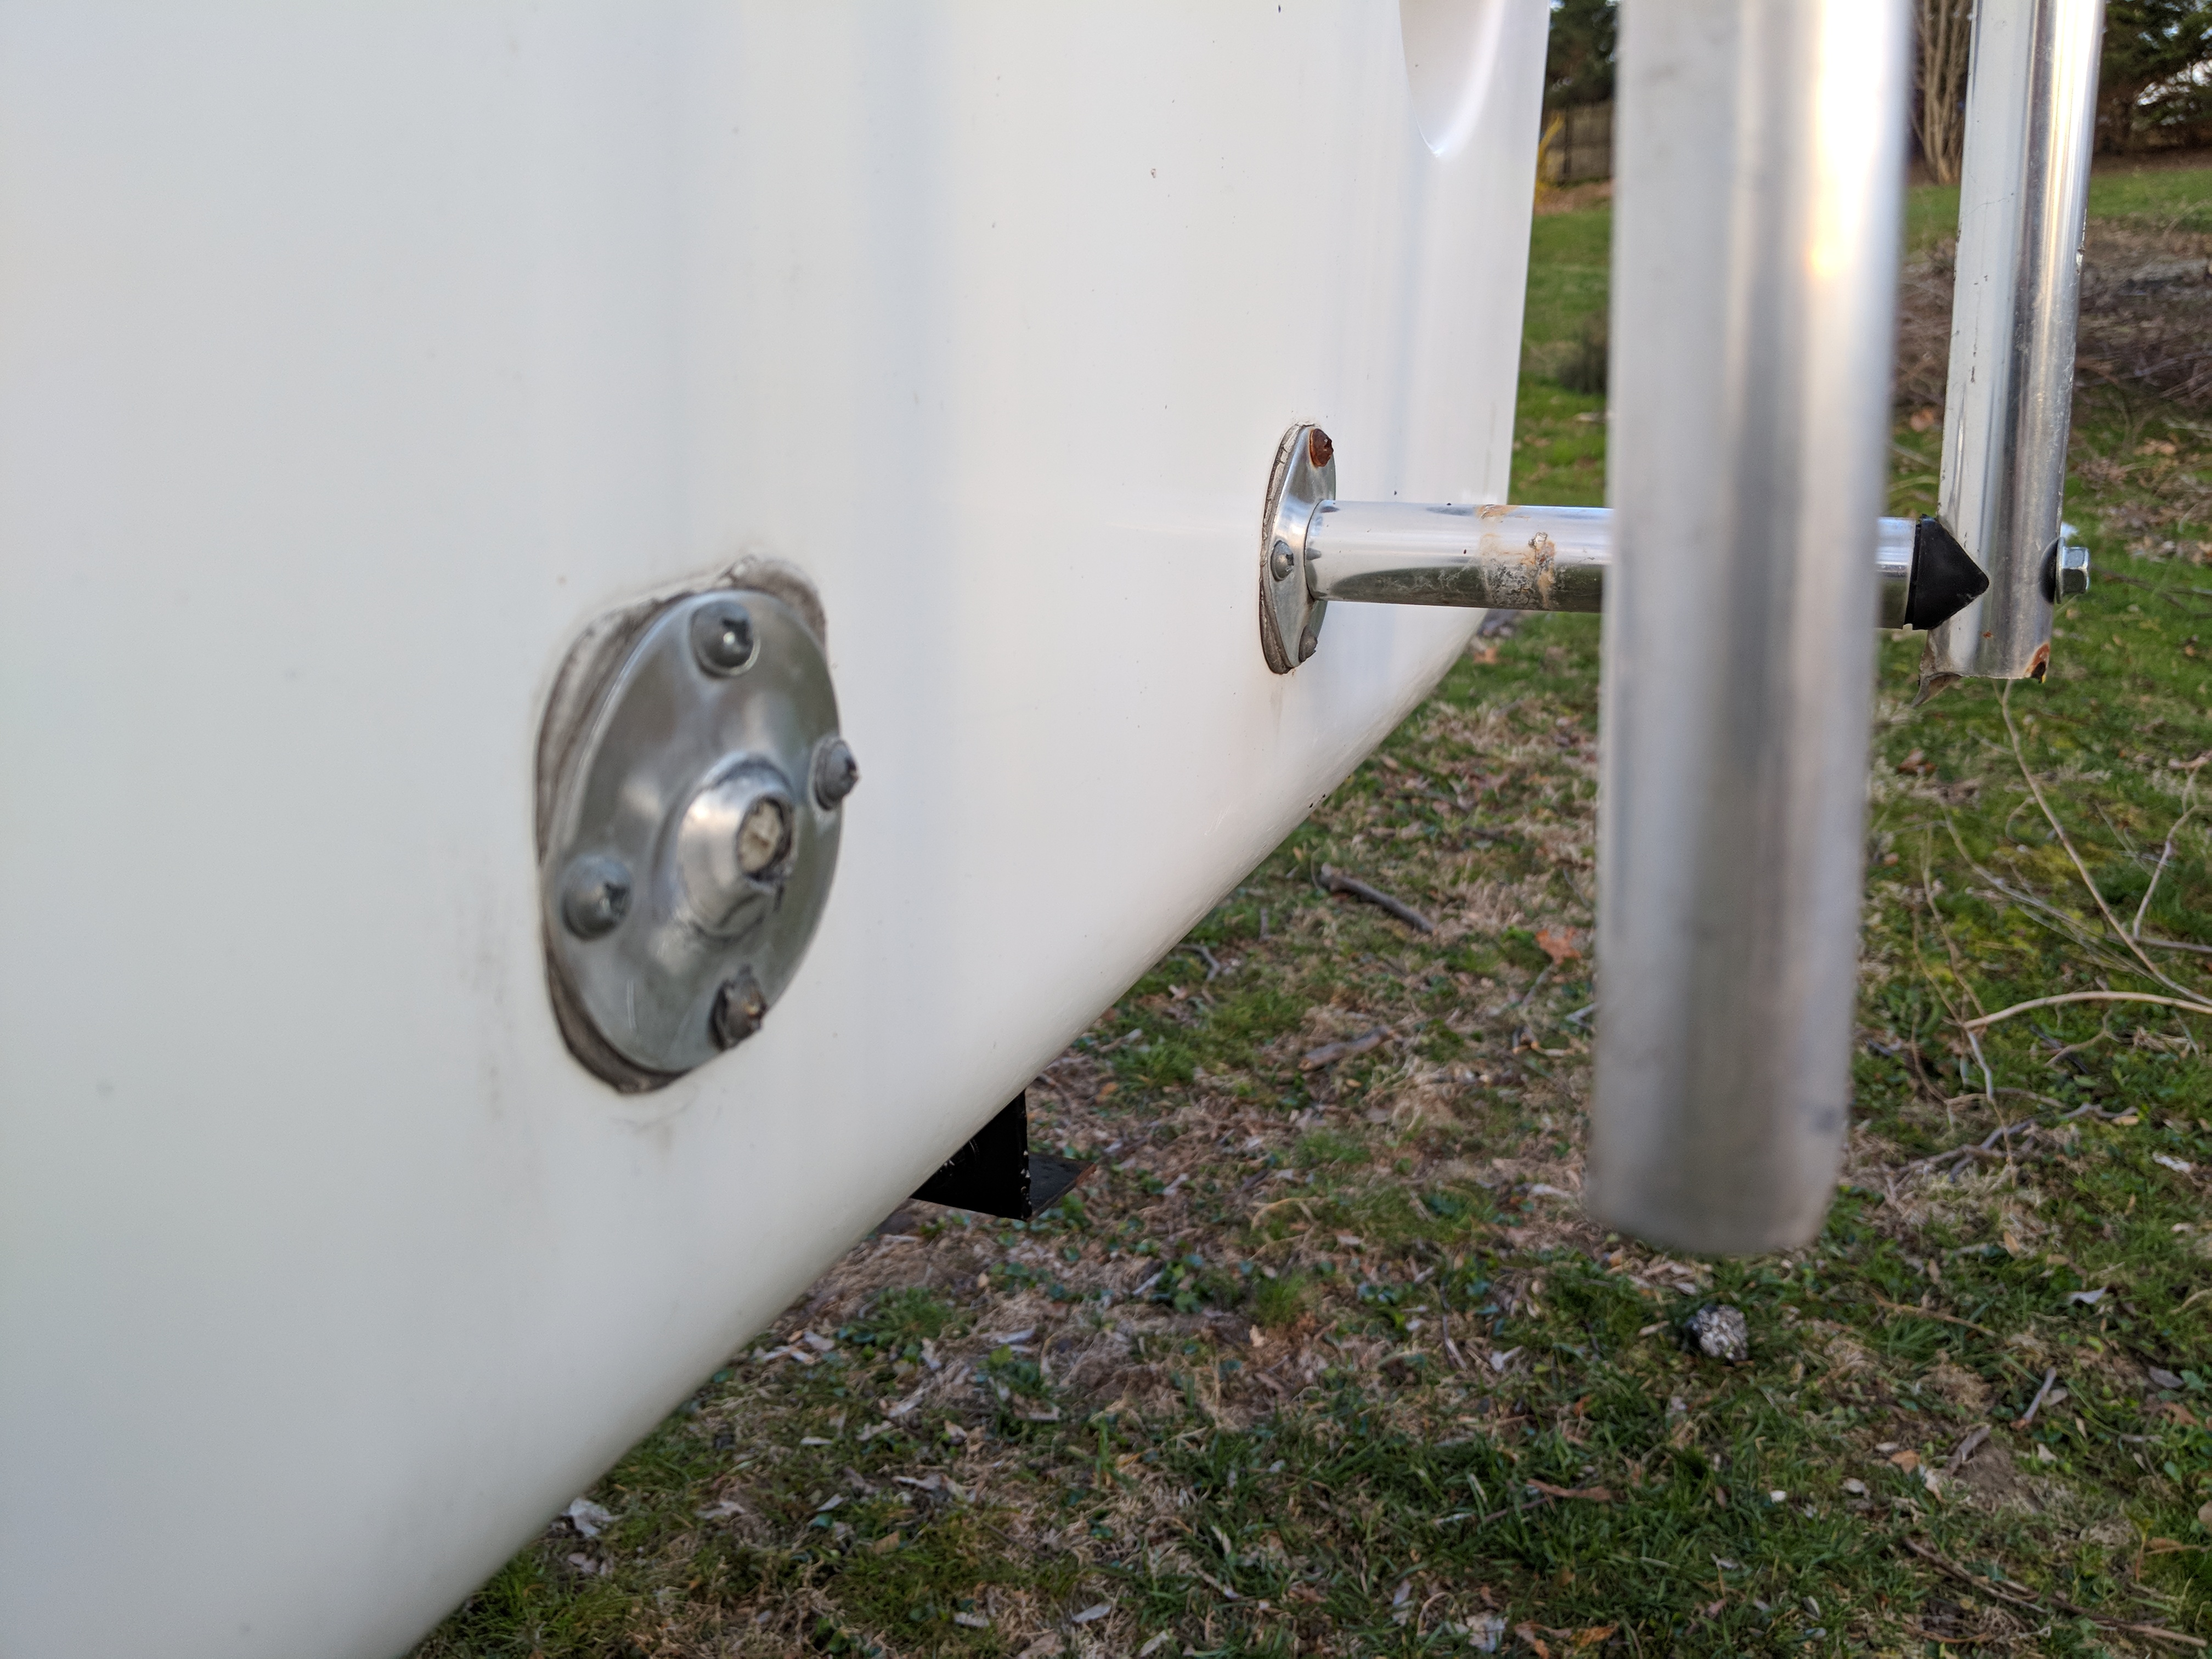
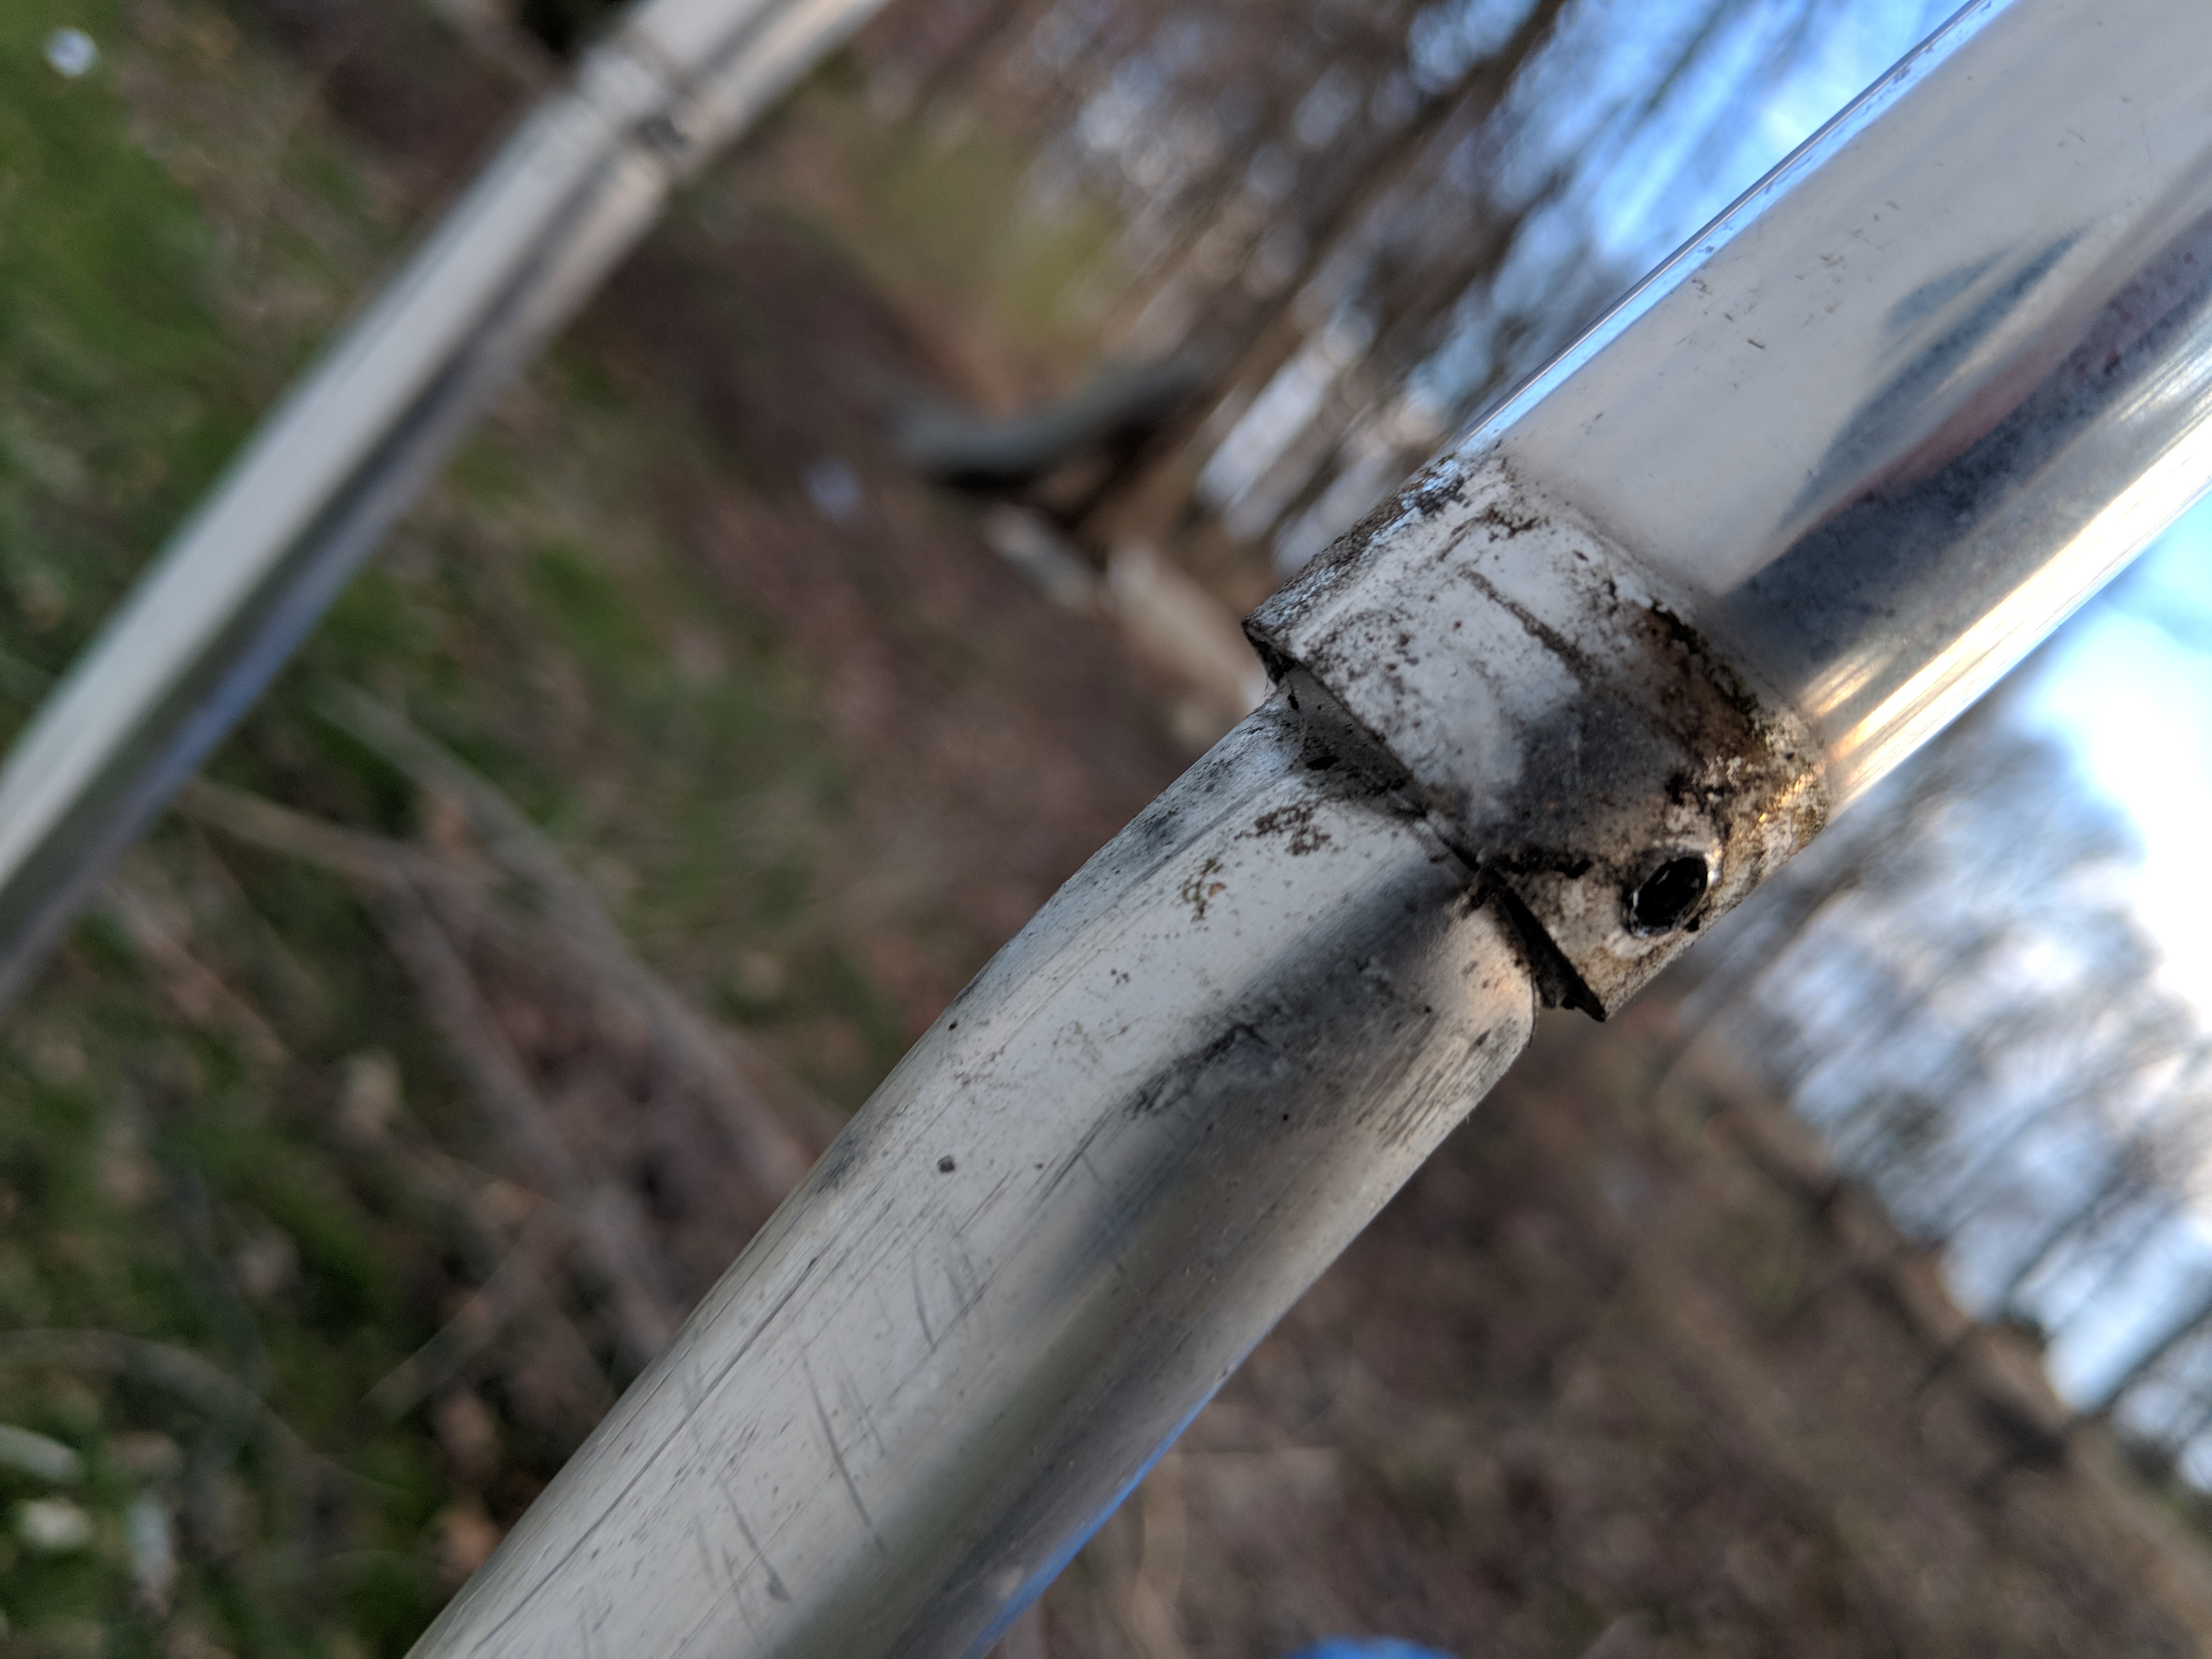
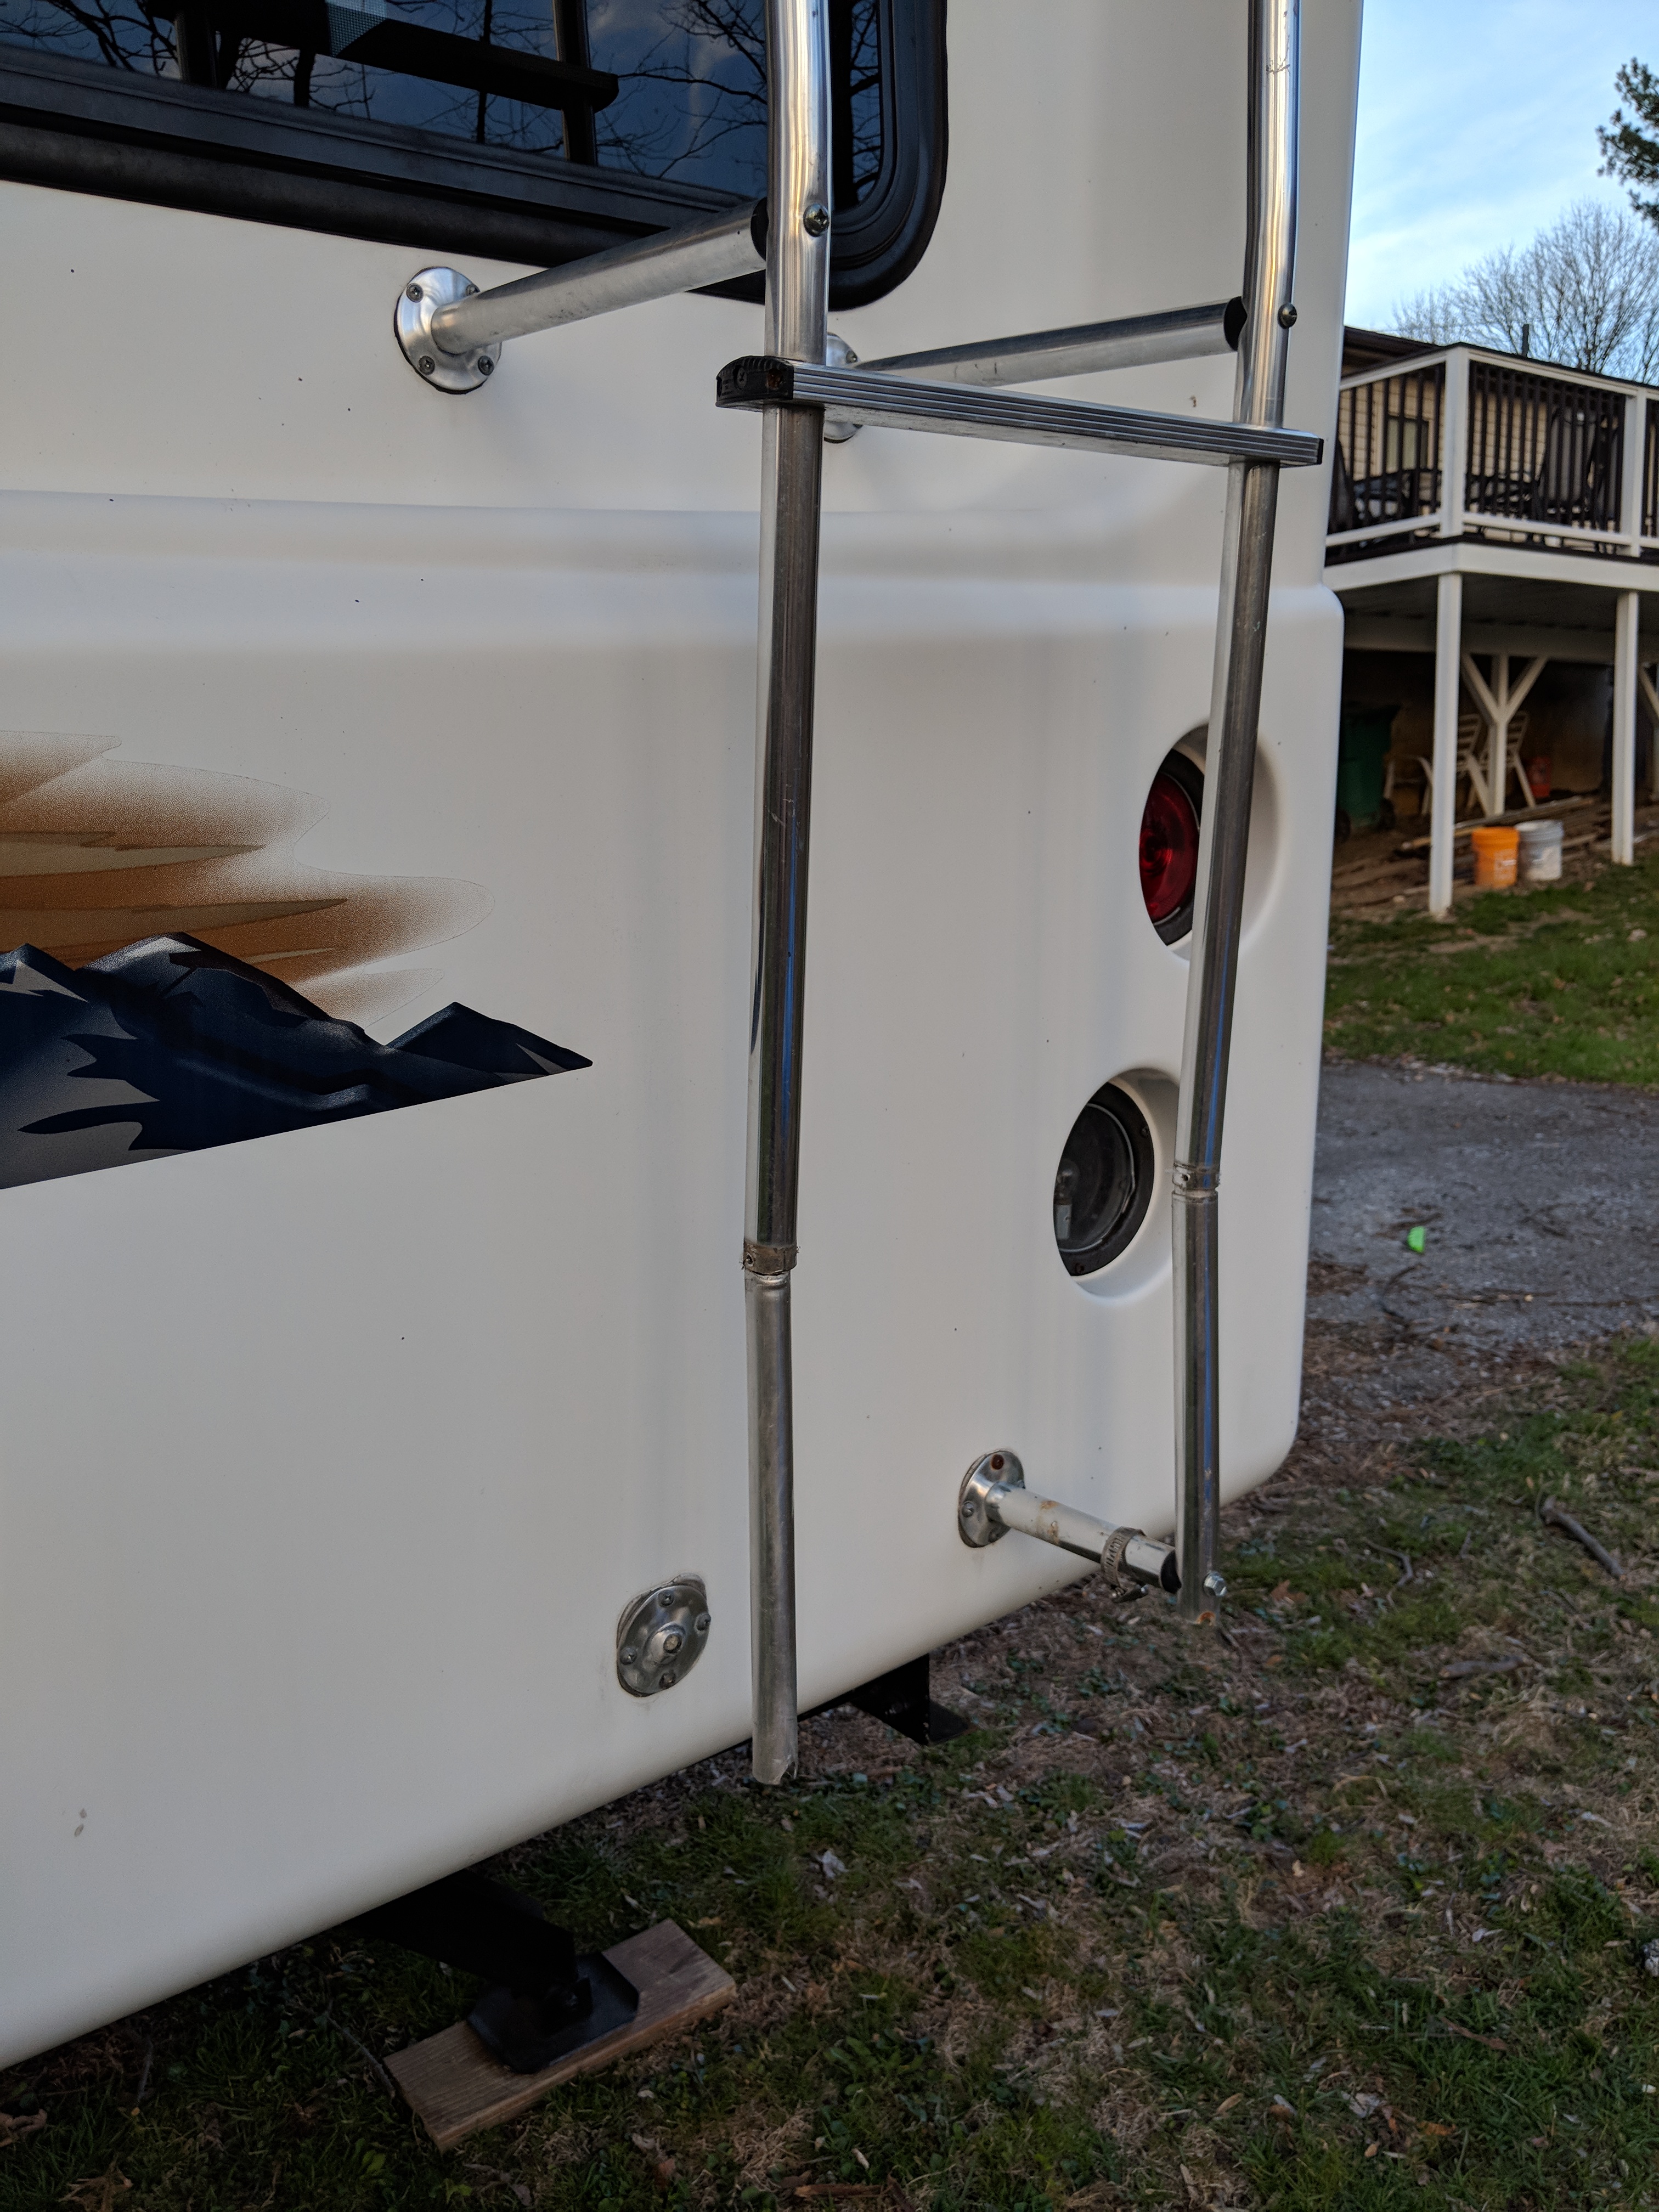
We considered leaving it as-is; we could use a step ladder to get past the first step, and it should support my weight even with the broken connector. I found a website selling repair parts, though, and I’d rather fix it properly than risk causing more serious damage.
Stabilizer Motor
The RV has stabilizer jacks at the rear of the RV that keep it from wobbling when you walk around inside. They’re supposed to have a motor powering them, but the motor was very broken.

We’re pretty sure the previous owners had a tire blow out, and that probably took the motor with it. After a lot of pain and suffering, I removed the broken motor and found the wiring needed to power it. We need to verify that there’s power to the wires, but if so, we’ll buy a new motor. Otherwise, we’ll be stuck lowering them with the manual crank.
Wheel Well
The tire blowout also damaged the wheel well of the RV, leaving the plywood under the kitchen floor exposed.
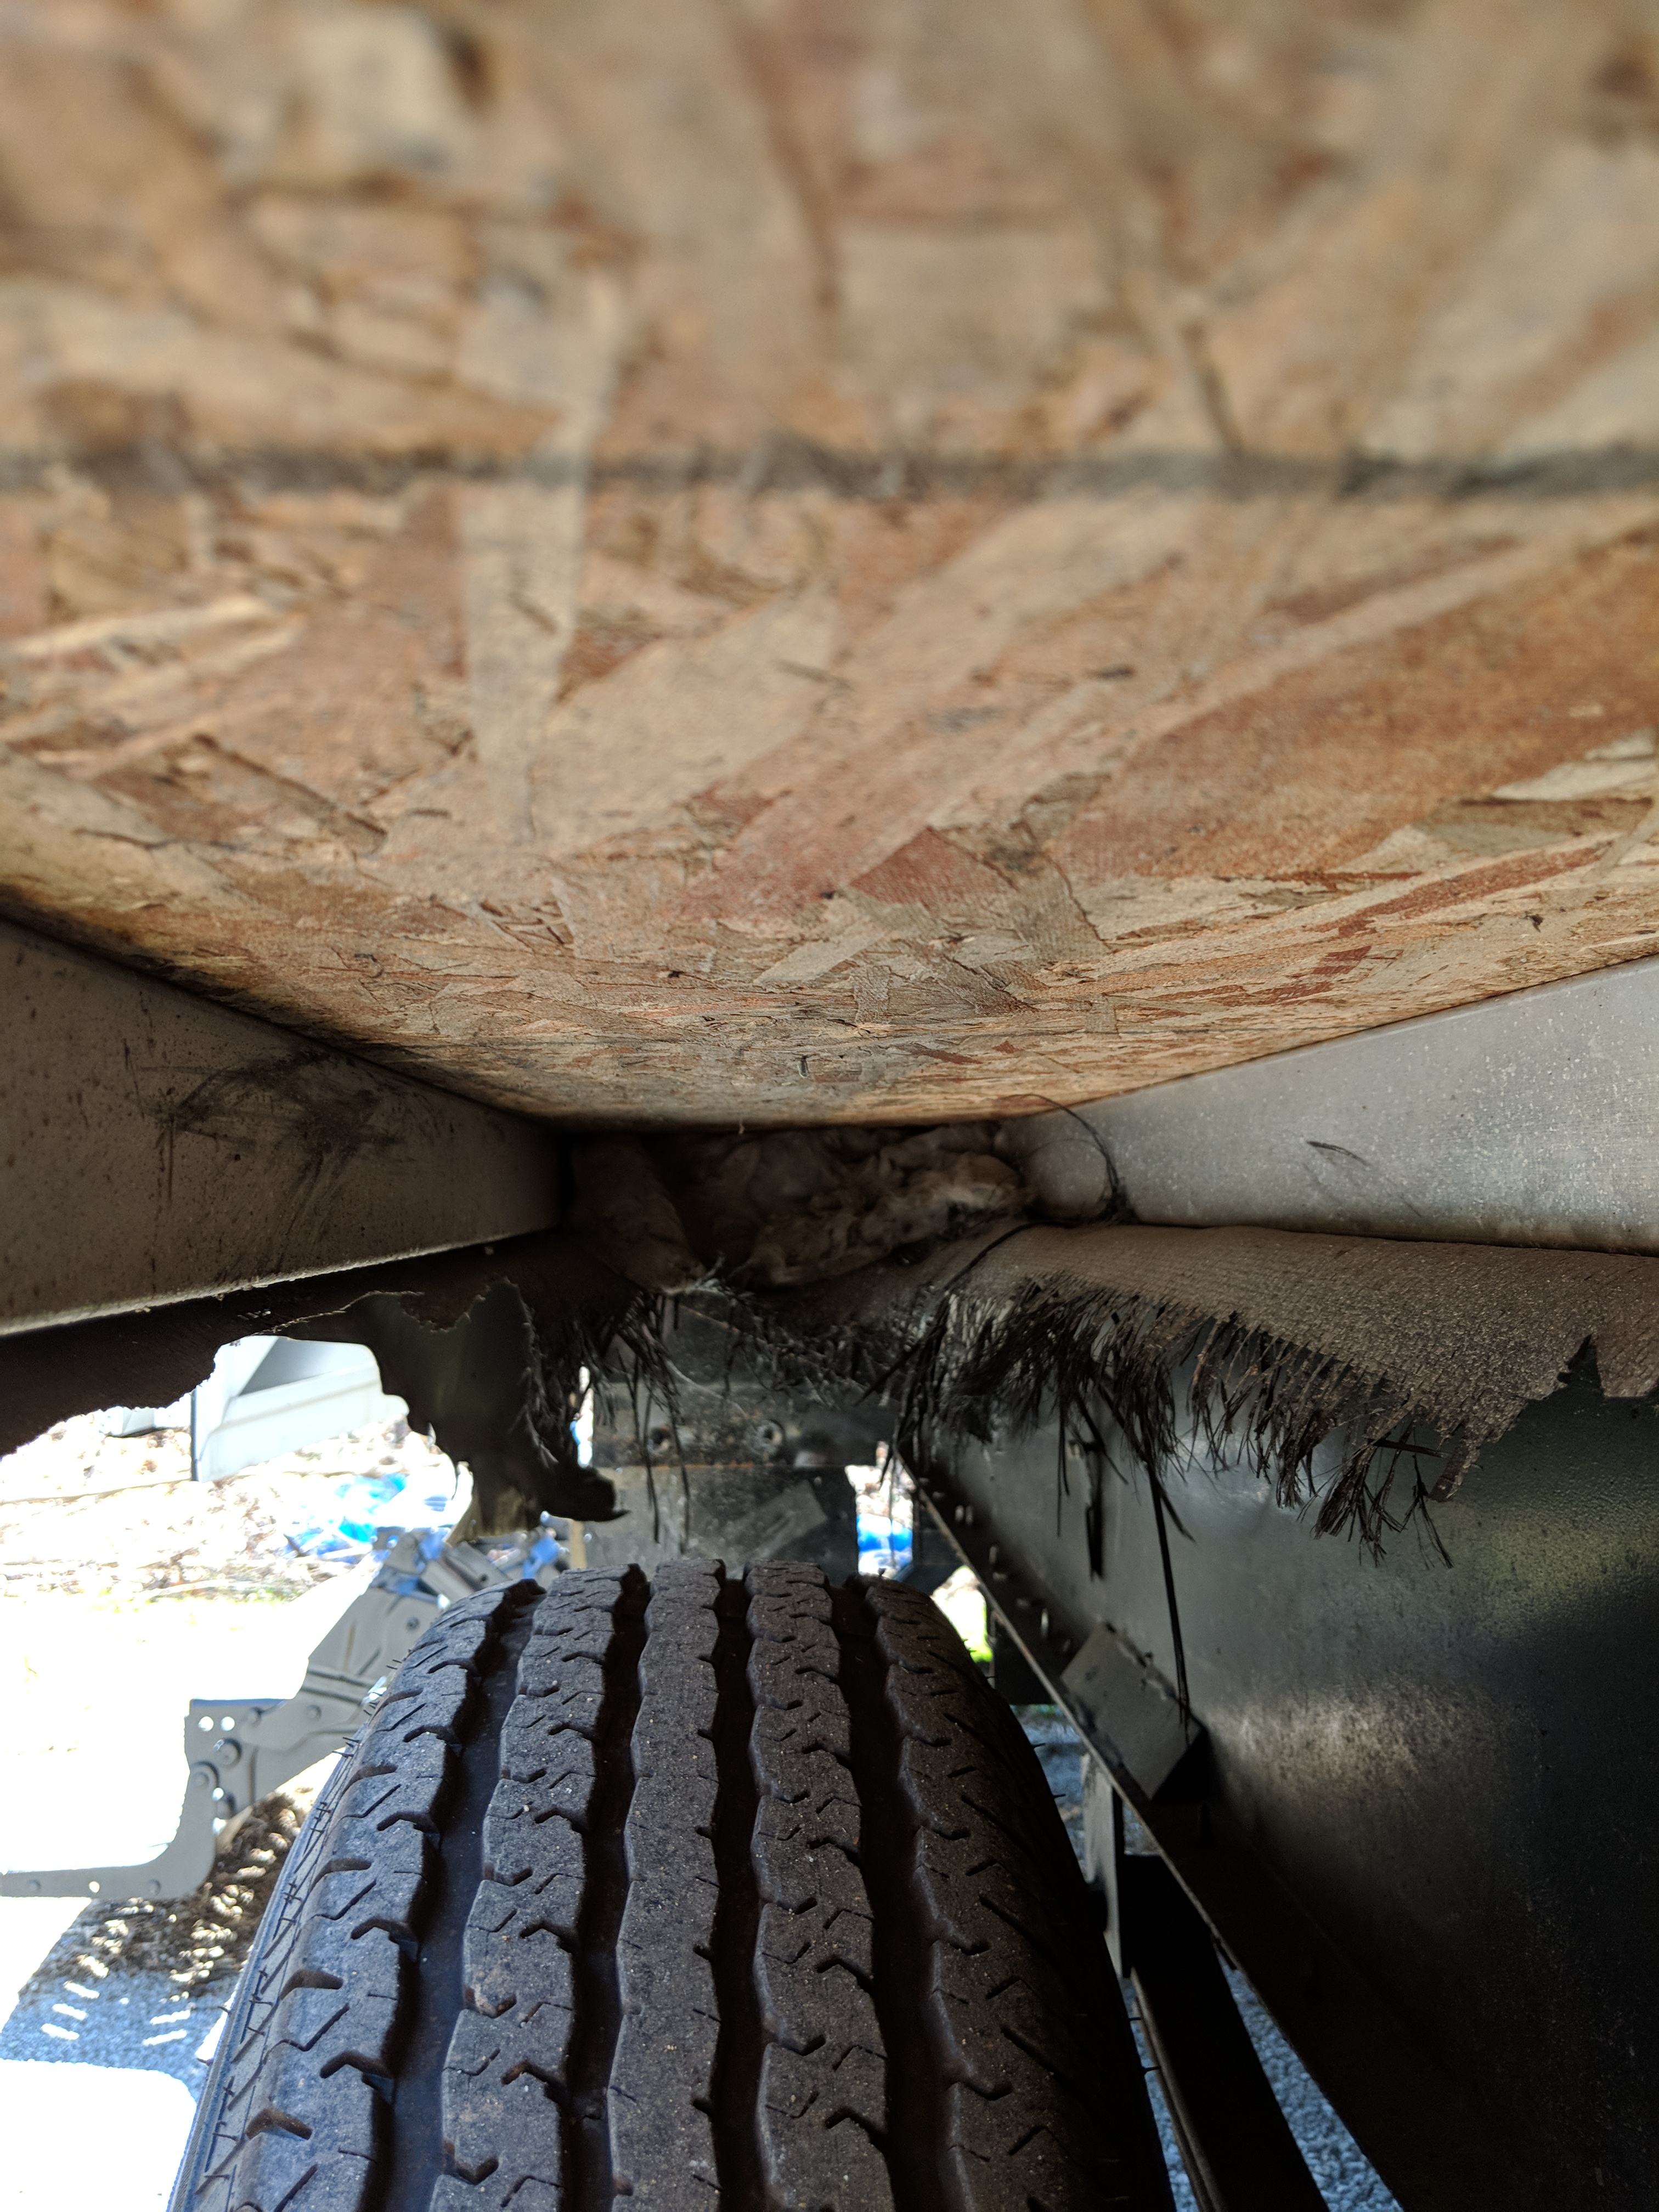
This will be an important repair since driving in the rain would quickly damage the flooring.
Kitty Litter Box Room
We’re planning to build a separate room for the kitties’ litter box. We originally hoped to put it in the space behind the basement paneling, but it turns out there’s a lot of stuff in there.

Instead, we’ll have to build a separate compartment in the basement itself, and we’ll build a walkway from the interior of the RV. We took some initial measurements of the basement and built a 3D model of it 2.
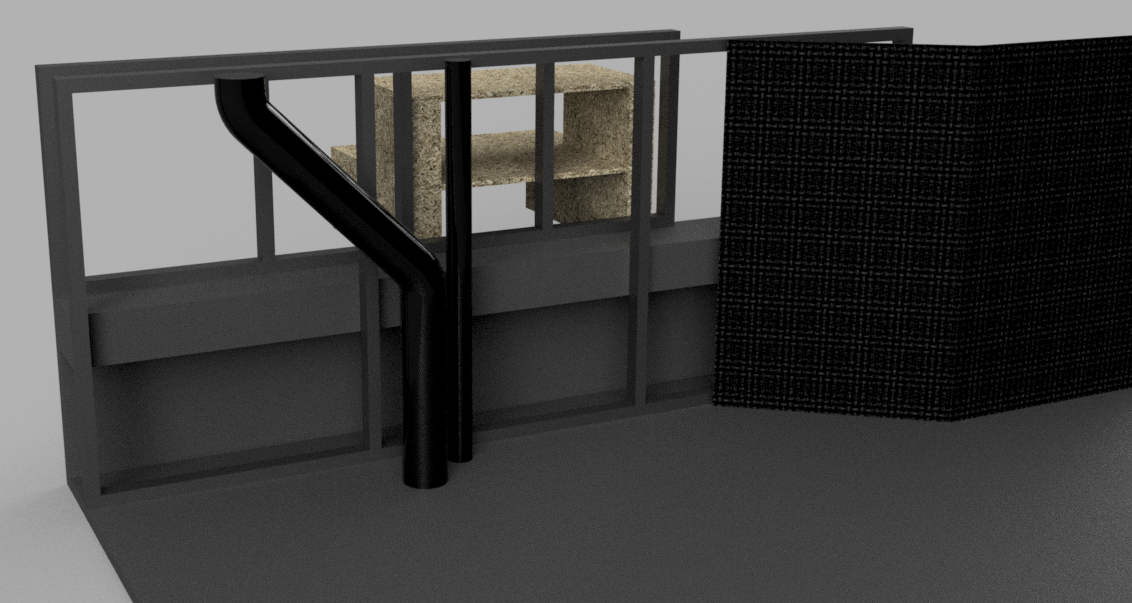
We need to take some additional measurements, and then we can start designing the litter box space.
RV Tour
Since we’ve only really shared one picture of the RV so far, I recorded a quick walkthrough video this week too. It should be up on youtube shortly.
